> For the complete documentation index, see [llms.txt](https://help.ppgg.in/llms.txt). Markdown versions of documentation pages are available by appending `.md` to page URLs; this page is available as [Markdown](https://help.ppgg.in/docs/admin-console/login-with-sso/sso-guides/auth0-saml.md).
# Auth0 SAML
{% hint style="success" %}
对应的[官方文档地址](https://bitwarden.com/help/article/saml-auth0/)
{% endhint %}
本文是**专门针对 Auth0** 用于配置 SAML 2.0 方式的 SSO 登录的帮助。有关其他 IdP 方式配置 SSO 登录的帮助,请参阅 [SAML 2.0 配置](/docs/admin-console/login-with-sso/sso-guides/generic-saml.md)。
配置需要在 Bitwarden 网页 App 和 Auth0 门户网站中同时进行。操作过程中,我们建议同时打开这两个界面,并按照文档记录的步骤顺序完成操作。
{% hint style="success" %}
**已经是 SSO 专家了吗?**跳过本文中的说明,然后下载示例配置,将里面的屏幕截图与您自己的配置进行比较。
**⬇️** [下载示例](https://bitwarden.com/assets/20UMzdVJ0bPm0ggsNF1QE5/e88a1f1e2ffbaddcf42c65d404916c23/saml-auth0-sample.zip)
{% endhint %}
## 在网页 App 中打开 SSO
登录到 Bitwarden [网页 App](https://bitwarden.com/help/getting-started-webvault/),然后使用产品切换器打开 Admin Console:

产品切换器

SAML 2.0 配置

创建 Auth0 应用程序

Auth0 设置
将此字段设置为从 Bitwarden SSO 配置界面中预先生成的 SP 实体 ID。
此自动生成的值可以从组织的设置 → 单点登录界面复制,并且会根据您的设置而有所不同。
|
| Allowed Callback URLS | 将此字段设置为从 Bitwarden SSO 配置界面中预先生成的断言消费者服务 (ACS) URL。
此自动生成的值可以从组织的设置 → 单点登录界面复制,并且会根据您的设置而有所不同。
|
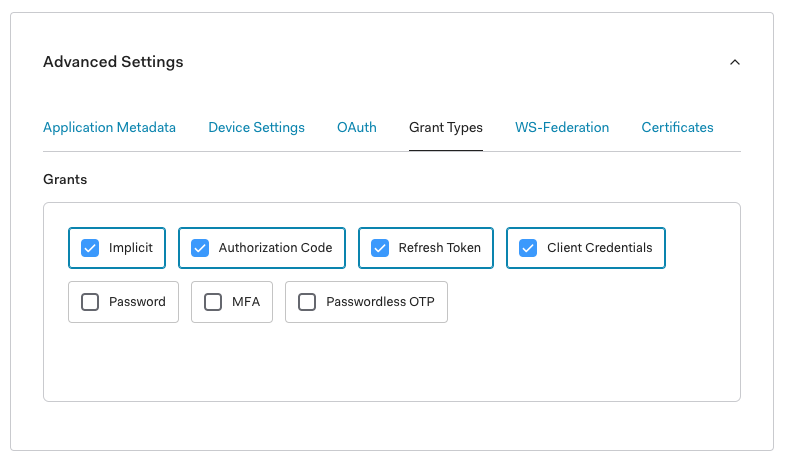
### Grant Types
在 **Advanced Settings** → **Grant Types** 部分,确保选择了以下授权类型(可以预先选择):
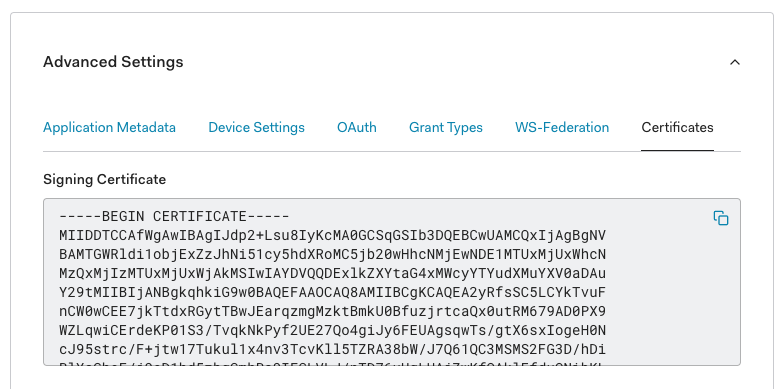
### Certificates
在 **Advanced Settings** → **Certificates** 部分,复制或下载您的签名证书。你现在还不需要用它做任何事情,但需要[稍后引用](/docs/admin-console/login-with-sso/sso-guides/auth0-saml.md#identity-provider-configuration)它。
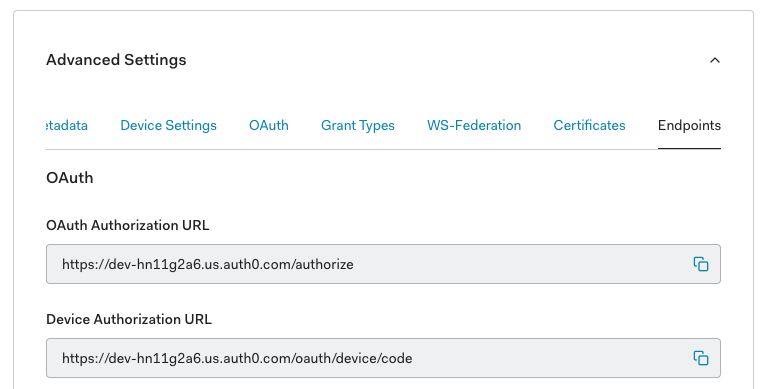
### Endpoints
不需要在 **Advanced Settings** → **Endpoints** 部分编辑任何东西,但你需要这个 SAML 端点,以便[稍后引用](/docs/admin-console/login-with-sso/sso-guides/auth0-saml.md#identity-provider-configuration)它。
{% hint style="success" %}
在较小的窗口中,**Endpoints** 选项卡可能会消失在浏览器的边缘。如果您找不到它,请单击 **Certificates** 选项卡,然后按右方向键 (→)。
{% endhint %}
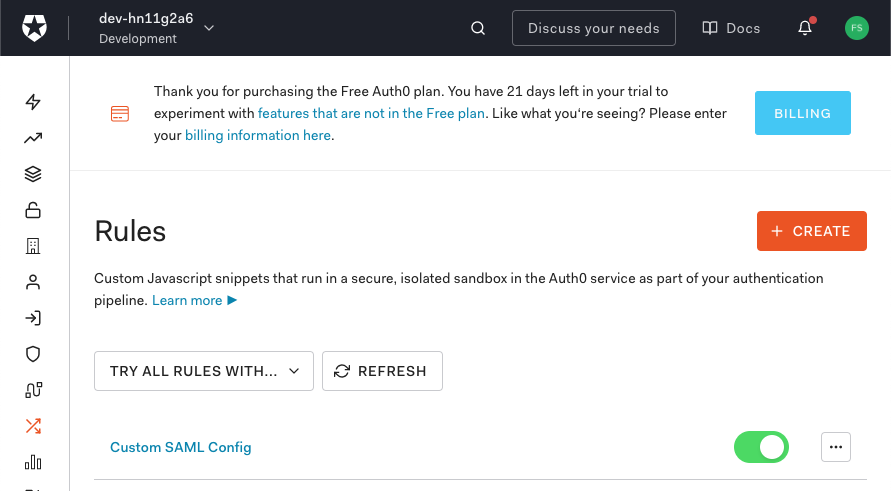
## ~~配置 Auth0 规则~~
~~创建规则来定制你的应用程序的 SAML 响应行为。虽然 Auth0 提供了~~[~~多个选项~~](https://auth0.com/docs/protocols/saml-protocol/customize-saml-assertions#saml-assertion-attributes)~~,但这里将只关注那些专门映射到 Bitwarden 的选项。要创建一个自定义 SAML 配置规则集,请使用 **Auth Pipeline → Rules** 菜单来 **Create**(创建)规则:~~
~~以下任何项目均可配置:~~
| 键 | 描述 |
| ---------------------- | ------------------------------------------------------------------------------------------------------------------------------------------------------------------------------------------------------------------------------------------------------------------------------------------------------- |
| `signatureAlgorithm` | Auth0 使用此算法对 SAML 断言或响应进行签名。默认为 rsa-sha1,您也可以将值设置为 rsa-sha256。
如果您更改了这个值,您必须:
-将 digestAlgorithm 设置为 sha256。
-(在 Bitwarden 中)将 Minimum Incoming Signing Algorithm 设置为 rsa-sha256。
|
| `digestAlgorithm` | 此算法用于计算 SAML 断言或响应的摘要。默认为 `sha-1`。如果您更改了 `signatureAlgorithm` 的值,您还应该将此值设置为 `sha256`. |
| `signResponse` | 默认,Auth0 将仅对 SAML 断言进行签名。将此属性设置为 `true` 可对 SAML 响应(而不是断言)进行签名。 |
| `nameIdentifierFormat` | 默认为 `urn:oasis:names:tc:SAML:1.1:nameid-format:unspecified`。您可以将值设置为[任一 SAML NameID 格式](https://docs.oracle.com/cd/E19316-01/820-3886/ggwbz/index.html)。如果这样做了,请将 SP **Name ID Format** 字段更改为相应的选项(参阅[这里](/docs/admin-console/login-with-sso/sso-guides/auth0-saml.md#service-provider-configuration))。 |
~~使用像下面这样的 **Script**(脚本)来实现这些规则。如需帮助,请参阅~~ [~~Auth0 文档~~](https://auth0.com/docs/protocols/saml-protocol/customize-saml-assertions#customize-saml-assertions-with-rules)~~。~~
```systemd
function (user, context, callback) {
context.samlConfiguration.signatureAlgorithm = "rsa-sha256";
context.samlConfiguration.digestAlgorithm = "sha256";
context.samlConfiguration.signResponse = "true";
context.samlConfiguration.nameIdentifierFormat = "urn:oasis:names:tc:SAML:1.1:nameid-format:emailAddress"
context.samlConfiguration.binding = "urn:oasis:names:tc:SAML:2.0:bindings:HTTP-Redirect";
callback(null, user, context);
}
```
## 配置 Auth0 操作
创建操作来自定义 Auth0 将在登录后流程中使用的逻辑,并规定与 Bitwarden 交换的参数。要创建必要的操作:
1、导航到 **Actions** → **Library** 然后选择 **Create Action** → **Build from scratch**。
2、为您的操作指定一个名称,例如 `Bitwarden SSO`,选择 **Login / Post Login** 触发器,选择 **Node 18 (Recommended)** 运行时选项,然后选择 **Create**。
3、在集成代码编辑器中,添加以下规则:
```yaml
exports.onExecutePostLogin = async (event, api) => {
// Modify SAML configuration settings
if (event.request.protocol === 'samlp') {
api.saml.updateConfiguration({
signatureAlgorithm: "rsa-sha256",
digestAlgorithm: "sha256",
signResponse: true,
nameIdentifierFormat: "urn:oasis:names:tc:SAML:1.1:nameid-format:emailAddress",
binding: "urn:oasis:names:tc:SAML:2.0:bindings:HTTP-Redirect"
});
}
};
```
4、选择 **Deploy**。
5、导航到 **Actions** → **Triggers** 然后选择 `post-login` 触发器。
6、将新操作拖放到 **Post Login** 流程中,然后选择 **Apply**。
配置上述操作时,您可以自定义以下任意属性以满足您的需求:
| 键 | 描述 |
| ---------------------- | ------------------------------------------------------------------------------------------------------------------------------------------------------------------------------------------------------------------------------------------------------------------------------------------------------- |
| `signatureAlgorithm` | Auth0 使用此算法对 SAML 断言或响应进行签名。默认为 rsa-sha1,您也可以将值设置为 rsa-sha256。
如果您更改了这个值,您必须:
-将 digestAlgorithm 设置为 sha256。
-(在 Bitwarden 中)将 Minimum Incoming Signing Algorithm 设置为 rsa-sha256。
|
| `digestAlgorithm` | 此算法用于计算 SAML 断言或响应的摘要。将此值设置为 `sha-256`. |
| `signResponse` | 默认,Auth0 将仅对 SAML 断言进行签名。将此属性设置为 `true` 可对 SAML 响应(而不是断言)进行签名。 |
| `nameIdentifierFormat` | 默认为 `urn:oasis:names:tc:SAML:1.1:nameid-format:unspecified`。您可以将值设置为[任一 SAML NameID 格式](https://docs.oracle.com/cd/E19316-01/820-3886/ggwbz/index.html)。如果这样做了,请将 SP **Name ID Format** 字段更改为相应的选项(参阅[这里](/docs/admin-console/login-with-sso/sso-guides/auth0-saml.md#service-provider-configuration))。 |
### 从规则迁移到操作
2024 年 11 月 18 日,Auth0 将弃用规则。如果您当前正在使用本文档先前版本中描述的规则,则可以使用 Auth0 规则界面上的 **Migrate to Action** 按钮来简化此过程。如果您这样做:
* 不要关闭预先存在的规则。
* 请按照上述步骤 5 和 6 中的说明将新操作添加到您的 `post-login` 触发器中。
## 返回网页 App
至此,您已经在 Auth0 门户网站配置好了您所需要的一切。请返回 Bitwarden 网页 App 完成配置。
单点登录界面将配置分为两个部分:
* **SAML 服务提供程序配置**将决定 SAML 请求的格式。
* **SAML 身份提供程序配置**将决定用于 SAML 响应的预期格式。
### 服务提供程序配置
除非您已配置了[自定义规则](/docs/admin-console/login-with-sso/sso-guides/auth0-saml.md#configure-auth-0-rules),否则您的服务提供重新配置就已经完成了。如果您配置了自定义规则或要对实现做进一步的更改,请编辑相关字段:
| 字段 | 描述 |
| ---------------------------------- | -------------------------------------------------------------------------------------------------------------------------------------------- |
| Name ID Format | [NameID Format](https://docs.oracle.com/cd/E19316-01/820-3886/ggvxx/index.html) 用于在 SAML 请求(`NameIDPolicy`)中指定。要忽略它,请设置为 **Not Configured**。 |
| Outbound Signing Algorithm | 用于签名 SAML 请求的算法,默认为 `rsa-sha256`。 |
| Signing Behavior | SAML 请求是否/何时将被签名。默认,Auth0 不要求对请求进行签名。 |
| Minimum Incoming Signing Algorithm | Bitwarden 在 SAML 响应中接受的最小签名算法。选择 `rsa-sha256` 除非您配置了[自定义签名操作](#configure-auth0-actions)。 |
| Want Assertions Signed | Bitwarden 是否要求 SAML 断言被签名。默认,Auth0 对 SAML 断言进行签名,因此请选中此框,除非您配置了[自定义签名操作](#configure-auth0-actions)。 |
| Validate Certificates | 通过受信任的 CA 使用来自 IdP 的受信任和有效证书时,请选中此框。除非在 Bitwarden SSO 登录 docker 镜像中配置了适当的信任链,否则自签名证书可能会失败。 |
完成服务提供程序配置部分后,**保存**您的工作。
### 身份提供程序配置
身份提供程序配置通常需要您返回 Auth0 门户以获取应用程序的值:
| 字段 | 描述 |
| ----------------------------------- | -------------------------------------------------------------------------------------------------------------------------------------------------------------------------------------------------------------------------------------------- |
| Entity ID | 输入您的 Auth0 应用程序的 **Domain** 值(参考[此处](/docs/admin-console/login-with-sso/sso-guides/auth0-saml.md#create-an-auth-0-application)),使用前缀 `urn:`,例如,`urn:bw-help.us.auth0.com`。 |
| Binding Type | 选择 **HTTP POST** 以匹配在您的 Auth0 应用程序中指定的 [Token Endpoint Authentication Method](#create-an-auth0-application) 的值。 |
| Single Sign On Service URL | 输入您的 Auth0 应用程序的 **SAML Protocol URL**(参阅 [Endpoints](/docs/admin-console/login-with-sso/sso-guides/auth0-saml.md#endpoints))。例如,`https://bw-help.us.auth0.com/samlp/HcpxD63h7Qzl420u8qachPWoZEG0Hho2`。 |
| Single Log Out Service URL | SSO 登录当前还**不支持** SLO。该选项计划未来开发,但是您可以根据需要预先配置它。 |
| Artifact Resolution Service URL | 输入您的 Auth0 应用程序的 **SAML Metadata URL**(参阅 [Endpoints](/docs/admin-console/login-with-sso/sso-guides/auth0-saml.md#endpoints))。例如,`https://bw-help.us.auth0.com/samlp/metadata/HcpxD63h7Qzl420u8qachPWoZEG0Hho2`. |
| X509 Public Certificate | 黏贴获取到的 Signing Certificate,移除 -----BEGIN CERTIFICATE----- 和 -----END CERTIFICATE-----。
证书值区分大小写,多余的空格、回车符和其他多余的字符将导致证书验证失败。
|
| Outbound Signing Algorithm | 选择 `rsa-sha256` 除非您配置了[自定义签名操作](#configure-auth0-actions)。 |
| Disable Outbound Logout Requests | SSO 登录当前还**不支持** SLO。该选项计划未来开发。 |
| Want Authentication Requests Signed | Auth0 是否要求 SAML 请求被签名。 |
{% hint style="info" %}
填写 X509 证书时,请注意到期日期。必须续签证书,以防止向 SSO 最终用户提供的服务中断。如果证书已过期,管理员和所有者账户将始终可以使用电子邮箱地址和主密码登录。
{% endhint %}
完成身份提供程序配置部分后,**保存**您的工作。
{% hint style="success" %}
您可以通过激活[单点登录身份验证策略](/docs/admin-console/oversight-visibility/enterprise-policies.md#require-single-sign-on-authentication)来要求用户使用 SSO 登录。
{% endhint %}
## 测试配置
配置完成后,通过导航到 或 [https://vault.bitwarden.eu](https://vault.bitwarden.eu/),输入您的电子邮箱地址,然后选择**使用单点登录**按钮进行测试:

登录选项界面