# 群组

{% hint style="success" %}
对应的[官方文档地址](https://bitwarden.com/help/article/about-groups/)
{% endhint %}

## 什么是群组？ <a href="#what-are-groups" id="what-are-groups"></a>

群组将个人成员关联在一起，并提供了一种可扩展的方式来分配特定[集合](/docs/admin-console/manage-shared-items/collections/about-collections.md)的访问权限和[权限](/docs/admin-console/manage-members/member-roles.md)。当[入职新用户](/docs/admin-console/manage-members/user-management.md)时，将他们添加到群组中，他们将自动继承该群组配置的权限。

{% hint style="info" %}
群组适用于[团队版和企业版组织](/docs/admin-console/organizations-overview.md#types-of-organizations)。
{% endhint %}

### 使用群组 <a href="#using-groups" id="using-groups"></a>

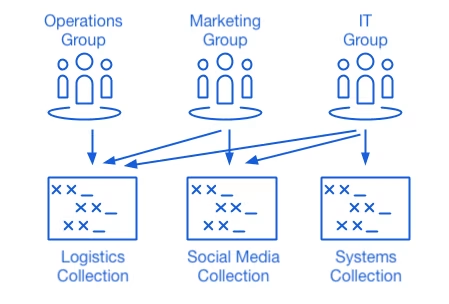
组织可以基于成员群组而不是个人成员来指定对[集合](/docs/admin-console/manage-shared-items/collections/about-collections.md)的访问权限。群组 - 集合的关联，为共享资源提供了深层次的访问控制和可扩展性。一种常见的群组 - 集合方法是创建**按部门的群组**、**按功能的集合**，例如：

<div align="left" data-with-frame="true"><figure><img src="https://bitwarden.com/assets/1WzkMkukq1i1mueOQP81JC/e6ba38466c2612b64b15344040fea1dd/collections-graphic-2.png?w=449&#x26;fm=avif" alt=""><figcaption><p>群组 - 集合的使用</p></figcaption></figure></div>

其他常见方法包括按**供应商或系统的集合**（例如 **Engineering** 群组中的成员被分配到 **AWS Credentials** 集合）和**按地区的群组**（例如成员被分配到 **US Employees** 群组或 **UK Employees** 群组）。

## 创建群组 <a href="#create-a-group" id="create-a-group"></a>

组织的[管理员（或更高级别）](/docs/admin-console/manage-members/member-roles.md)和[提供商用户](/docs/provider-portal/provider-users.md#provider-user-types)可以创建和管理群组。要创建群组：

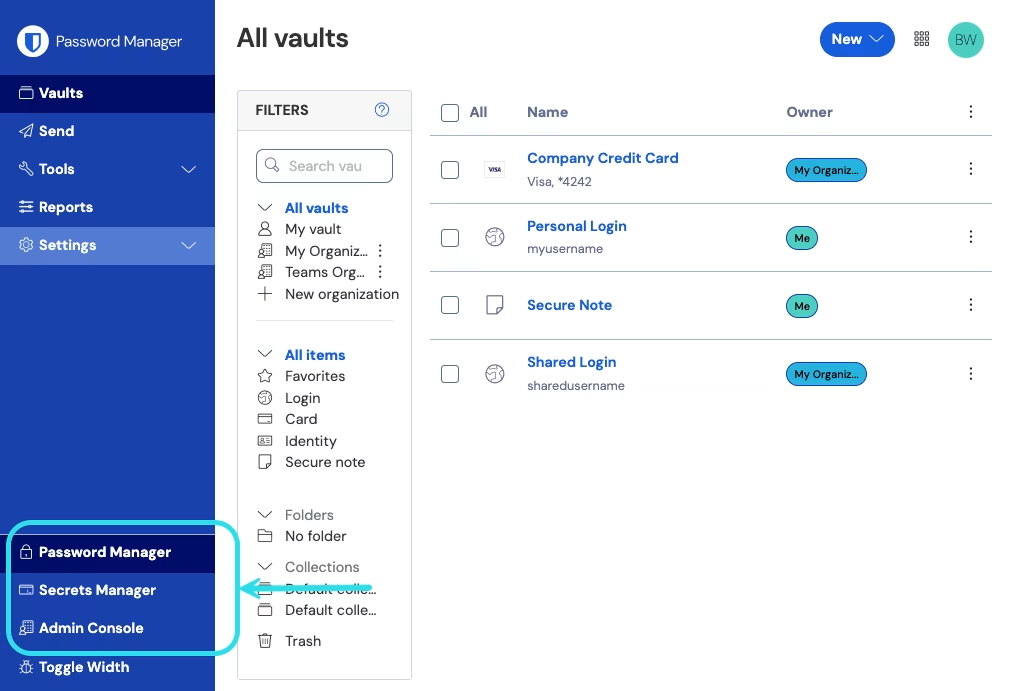
1、登录到[网页 App](https://vault.bitwarden.com/)，然后使用产品切换器打开管理控制台：

<div align="left" data-with-frame="true"><figure><img src="https://bitwarden.com/assets/2uxBDdQa6lu0IgIEfcwMPP/e3de3361749b6496155e25edcfdcf08b/2024-12-02_11-19-56.png?w=1013&#x26;fm=avif" alt=""><figcaption><p>产品切换器</p></figcaption></figure></div>

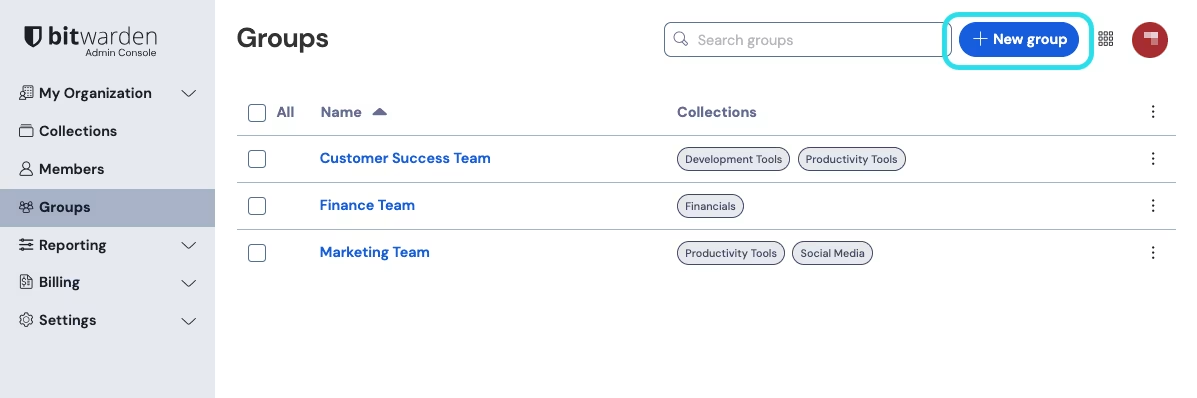
2、导航到**群组**，然后选择 ✚**新建群组**按钮：

<div align="left" data-with-frame="true"><figure><img src="https://bitwarden.com/assets/FefJG4qBRiWkTzsxBKfm6/53093b4dd48e534cdde9f3e249d3c382/2024-12-03_14-22-27.png?w=1197&#x26;fm=avif" alt=""><figcaption><p>新建群组</p></figcaption></figure></div>

3、在**群组信息**选项卡中，为您的群组起个**名称**。

{% hint style="success" %}
**外部 ID** (External Id) 字段只有在使用 [Directory Connector](/docs/admin-console/manage-members/directory-connector/about-directory-connector.md) 时才相关，并且在使用 [SCIM](/docs/admin-console/manage-members/scim/about-scim.md)、Directory Connector 或 API 配置时，该字段才会在对话框中可见。
{% endhint %}

4、在**成员**选项卡中，将成员分配到群组。

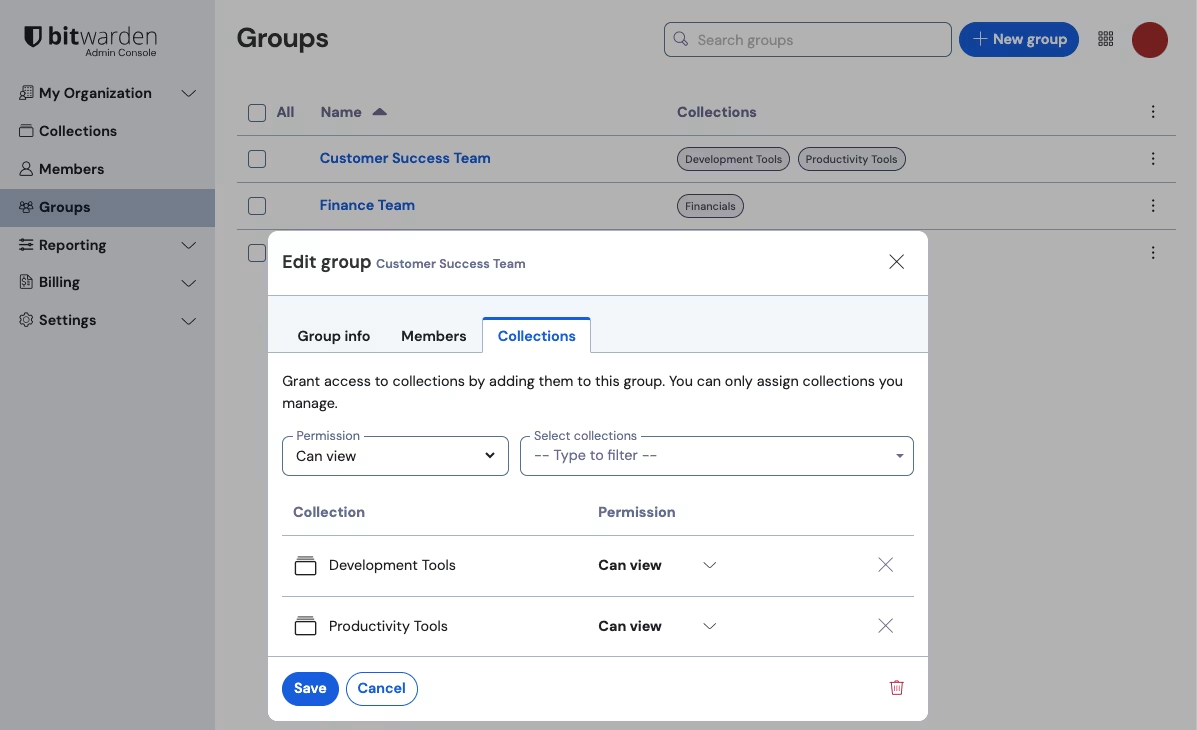
5、在**集合**选项卡中，将集合分配给群组。对于每个集合，选择所需的[权限](/docs/admin-console/manage-members/member-roles.md)：

<div align="left" data-with-frame="true"><figure><img src="https://bitwarden.com/assets/1NP5OrGCAVOZmkxfGjhU2h/7c0375c7f8f8540863a5391b0062454a/2024-12-03_14-23-45.png?w=1197&#x26;fm=avif" alt=""><figcaption><p>集合权限</p></figcaption></figure></div>

权限可以指定成员对集合中的项目仅查看权限或编辑权限，以及他们是否可以管理集合的访问权限，以及[密码是否隐藏](/docs/admin-console/manage-members/member-roles.md)。

6、选择**保存**以完成群组的创建。

### 编辑成员分配 <a href="#edit-members-assignments" id="edit-members-assignments"></a>

创建和配置群组后，即可向其中添加成员：

1、在管理控制台中，打开**群组**视图。

2、对于要编辑的群组，使用 **≡**&#x9009;项菜单选择**成员**。

3、从群组中添加或移除成员，然后选择**保存**。

{% hint style="info" %}
如果**所有者和管理员可以管理所有集合和项目**选项被禁用，管理员将无法将自己添加到群组中。不过，他们可以将其他管理员添加到群组。更多信息请参阅[集合管理设置](/docs/admin-console/manage-shared-items/collections/collection-settings.md)。
{% endhint %}

### 编辑集合分配 <a href="#edit-collections-assignments" id="edit-collections-assignments"></a>

如果您要更改已分配给群组的[集合](/docs/admin-console/manage-shared-items/collections/about-collections.md)或[权限](/docs/admin-console/manage-members/member-roles.md)：

1. 在管理控制台中，打开**群组**视图。
2. 对于您想要编辑的群组，使用 **≡**&#x9009;项菜单选择**集合**。
3. 从群组中添加、移除或更改集合权限，然后选择**保存**。


---

# Agent Instructions: Querying This Documentation

If you need additional information that is not directly available in this page, you can query the documentation dynamically by asking a question.

Perform an HTTP GET request on the current page URL with the `ask` query parameter:

```
GET https://help.ppgg.in/docs/admin-console/manage-members/groups.md?ask=<question>
```

The question should be specific, self-contained, and written in natural language.
The response will contain a direct answer to the question and relevant excerpts and sources from the documentation.

Use this mechanism when the answer is not explicitly present in the current page, you need clarification or additional context, or you want to retrieve related documentation sections.