# Ping Identity SCIM 集成

{% hint style="success" %}
对应的[官方文档地址](https://bitwarden.com/help/ping-identity-scim-integration/)
{% endhint %}

跨域身份管理系统 (SCIM) 用于在您的 Bitwarden 组织中自动配置和取消配置成员和群组。

{% hint style="info" %}
SCIM 集成适用于**团队组织和企业组织**。未使用与 SCIM 兼容的身份提供程序的客户可以考虑使用 [Directory ](/docs/admin-console/manage-members/directory-connector/directory-connector-cli.md)SCIM 集成适用于**团队版组织和企业版组织**。未使用与 SCIM 兼容的身份提供程序的客户可以考虑使用 [Directory Connector](/docs/admin-console/manage-members/directory-connector/directory-connector-cli.md) 作为替代的配置方式。
{% endhint %}

本文将帮助您配置与 Ping Identity 的 SCIM 集成。配置过程需要同时使用 Bitwarden 网页密码库和 Ping Identity 管理员仪表板。在进行操作时，我们建议您同时准备好这两者，并按照文档中的顺序步骤完成操作。

## 启用 SCIM <a href="#enable-scim" id="enable-scim"></a>

{% hint style="info" %}
**您是自托管 Bitwarden 吗？**&#x5982;果是，请在继续操作之前完成[这些步骤为您的服务器启用 SCIM](/docs/self-hosting/deploy-and-configure/optional-features/self-hosting-scim.md)。
{% endhint %}

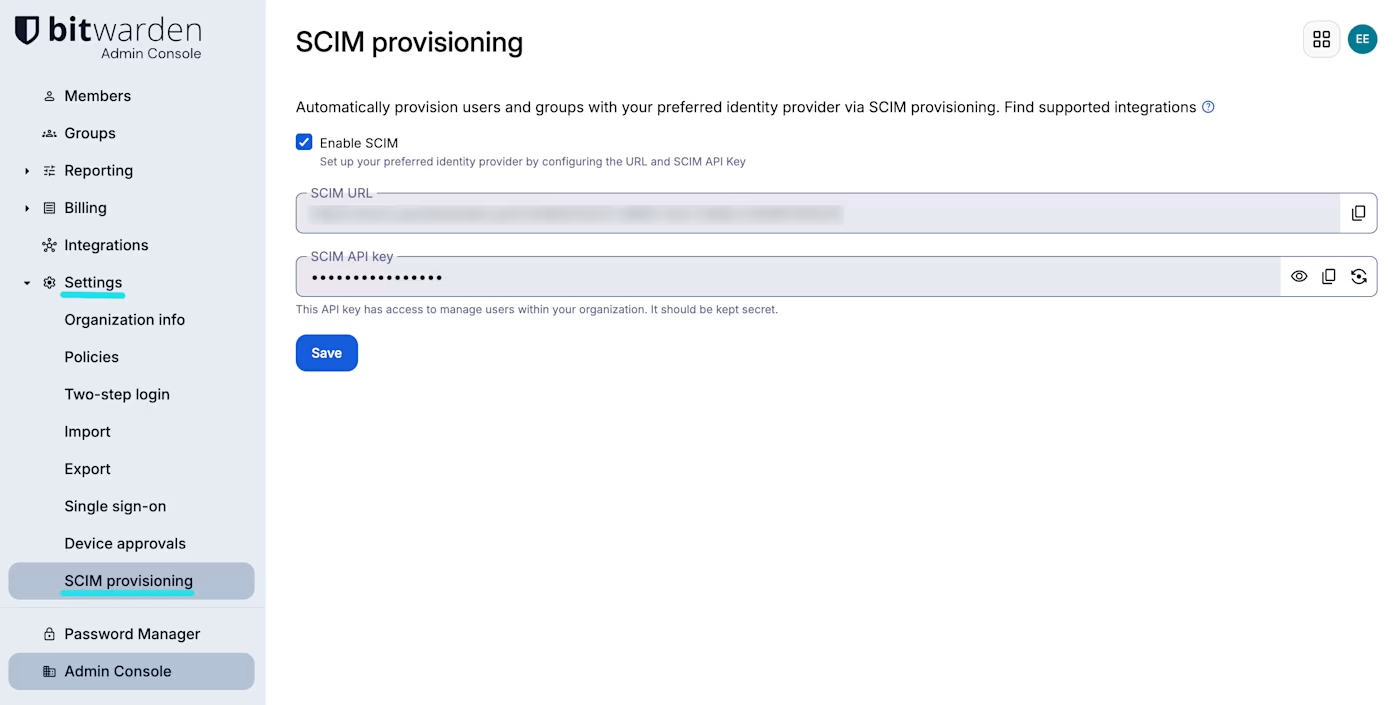
要开始您的 SCIM 集成，请打开 Admin Console，然后导航至**设置** → **SCIM 配置**：

<div align="left" data-with-frame="true"><figure><img src="https://bitwarden.com/assets/6sw1kuK7GuZ3dfQkkbs6rV/a4f4e18e561733297338e4ed44c6ed8c/2024-12-03_15-25-46.png?w=1197&#x26;fm=avif" alt=""><figcaption><p>SCIM 配置</p></figcaption></figure></div>

选中**启用 SCIM** 复选框，并记录下您的 **SCIM URL** 和 **SCIM API 密钥**。在后面的步骤中，您将需要使用这两个值。

## 创建 SCIM App <a href="#create-a-scim-app" id="create-a-scim-app"></a>

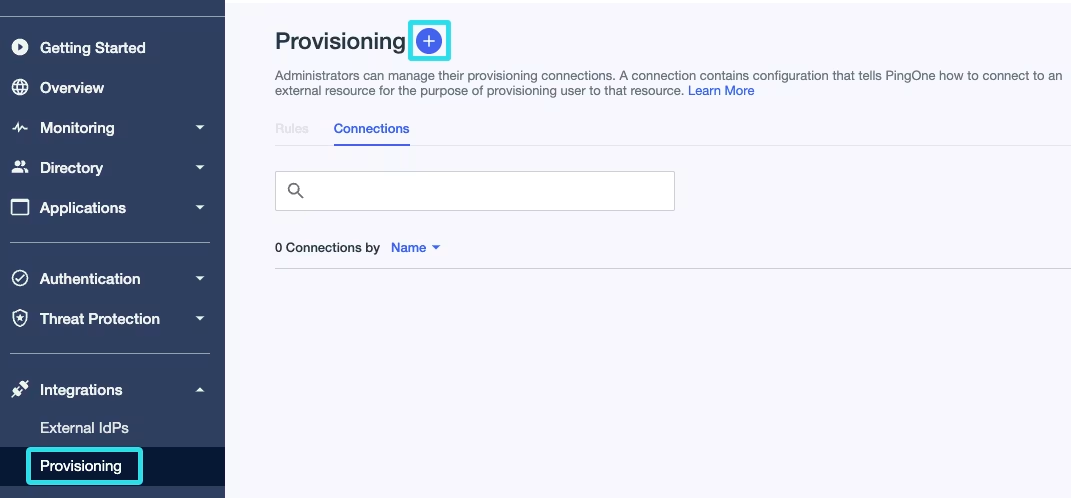
1、导航至配置 ✚**New Connection**。

<div align="left" data-with-frame="true"><figure><img src="https://bitwarden.com/assets/7rehLEEEAvNwsBHGKqDwln/babec3f81595ead3253285229fe0e653/2024-10-09_11-29-32.png?w=1071&#x26;fm=avif" alt=""><figcaption><p>Ping Identity 创建新连接</p></figcaption></figure></div>

2、在创建 New Connection 窗口中，为 **Identity Store** 选择 **Select** 选项。

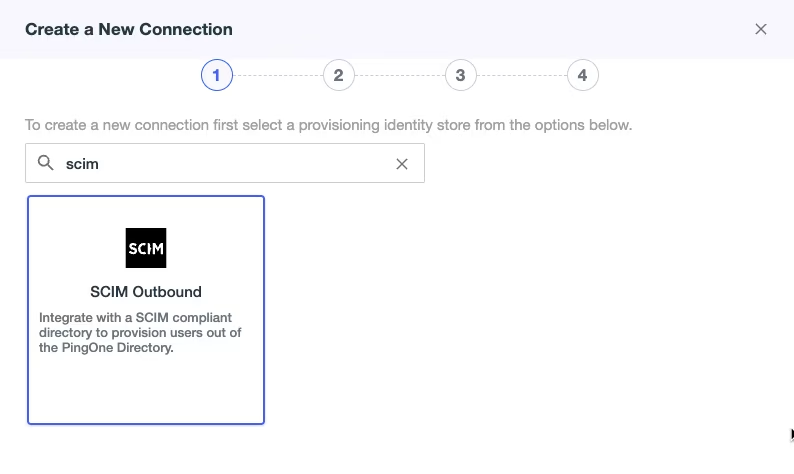
3、在 **Identity Store** 中，在搜索框中输入 SCIM，然后选择 **SCIM Outbound**。完成此步骤后，选择 **Next**：

<div align="left" data-with-frame="true"><figure><img src="https://bitwarden.com/assets/1FYhcQpQbuh78ypyLxi2Jn/9081de91a419870aad37dded7c5db080/2024-10-09_11-35-23.png?w=794&#x26;fm=avif" alt=""><figcaption><p>SCIM 连接</p></figcaption></figure></div>

4、为 SCIM 连接输入名称和描述。

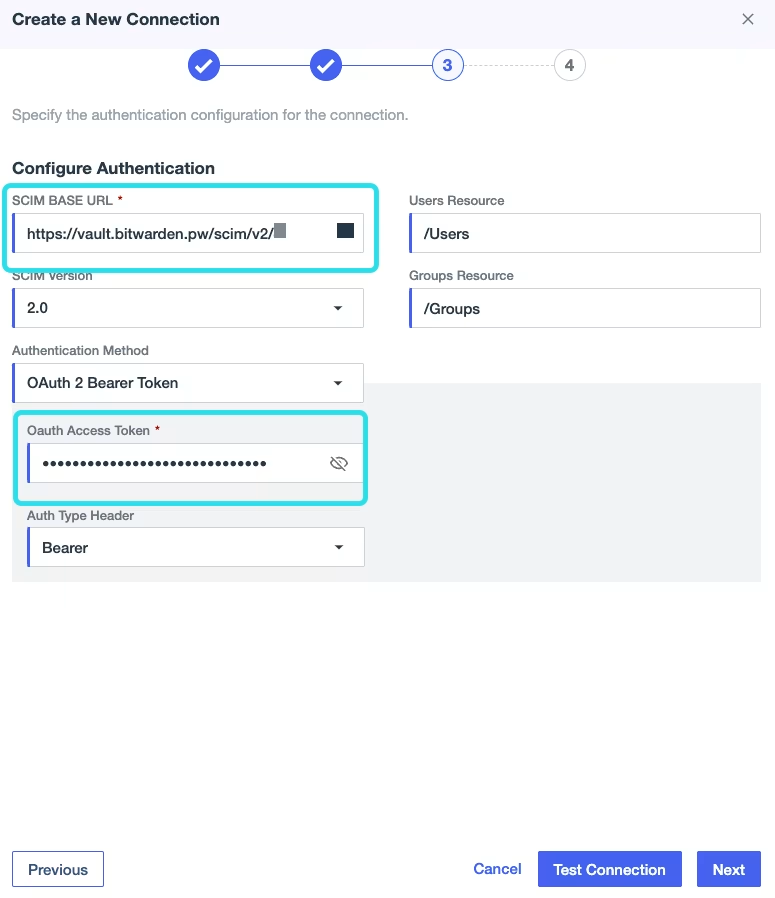
5、接下来，您需要输入 **SCIM BASE URL**。复制 Bitwarden 管理控制台中「启用 SCIM」页面上的 **SCIM URL** 值并粘贴到该字段中。

6、使用 **Authentication Method** 下拉菜单，选择 **OAuth 2 Bearer Token**。此时会出现一个名为 **Oauth Access Token** 的字段，请将 Bitwarden 管理控制台中的 **SCIM API key** 值粘贴到该字段中。&#x20;

<div align="left" data-with-frame="true"><figure><img src="https://bitwarden.com/assets/7uGtHe2xM6QxJnqs5LNycl/6408a86d4332001ab1dac5f99c222887/2024-10-09_12-06-25.png?w=775&#x26;fm=avif" alt=""><figcaption><p>Ping Identity SCIM 连接测试</p></figcaption></figure></div>

7、设置完成后，您可以选择 **Test Connection**。如果成功，请选择 **Next**。

8、在 **Configure Preferences** 页面，选择所需的首选项和操作。

{% hint style="info" %}
如果用户不符合 Ping Identity 上设置的筛选标准，将移除操作设置为 `Disable` 将导致 Bitwarden 用户被移至 `Revoked` 状态。恢复t条件后，会将使用户恢复到 `previous state`。

如果移除操作设置为 `Delete`，同样的操作将[取消配置用户](/docs/admin-console/manage-members/user-management.md#offboard-users)。
{% endhint %}

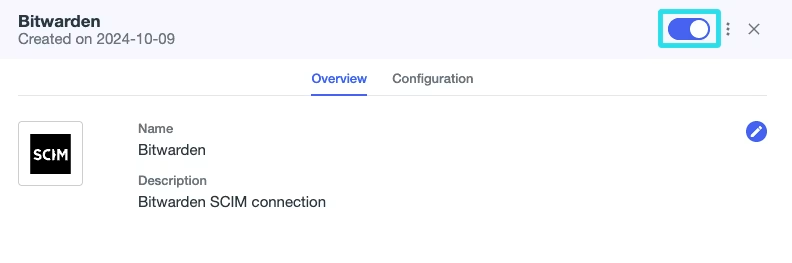
9、完成后选择 **Save**。选择新创建的连接，然后使用切换开关启用此连接。

<div align="left" data-with-frame="true"><figure><img src="https://bitwarden.com/assets/1GpO1UTspVLzLh0SwRgKuf/4669f4225cca00108f4f0a8700c38e2e/2024-10-09_14-13-24.png?w=792&#x26;fm=avif" alt=""><figcaption><p>启用 Ping Identity 连接</p></figcaption></figure></div>

## 创建规则 <a href="#create-a-rule" id="create-a-rule"></a>

在同步用户群组和目录之前，需要一条规则来将用户群组同步到 Bitwarden SCIM。

1、返回 **Provisioning** 界面。

2、选择 **Rules** 选项卡，然后选择 ✚**New Rule**。

3、为规则输入一个特定于应用程序的名称，然后选择 **Create Rule**。

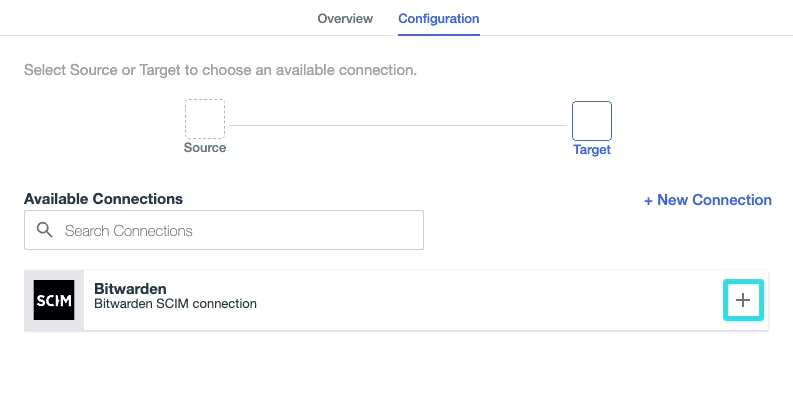
4、在 Configuration 选项卡中编辑新规则。选择 **Bitwarden SCIM connection**，然后 **Save**。

<div align="left" data-with-frame="true"><figure><img src="https://bitwarden.com/assets/3eKZXwtiFdQqhlUNRSm6jr/167c28c624cf7f9ceb7dc563d58c64f4/2024-10-09_14-11-35.png?w=793&#x26;fm=avif" alt=""><figcaption><p>Ping Identity 规则</p></figcaption></figure></div>

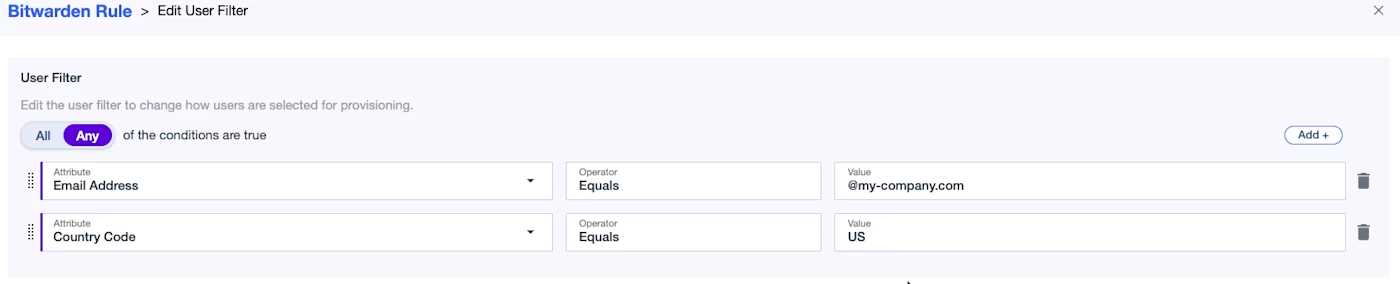
5、选择 Configuration 选项卡然后添加一个 **✏️User Filter**。更多信息，请参阅 [Ping Identity 文档](https://docs.pingidentity.com/pingone/integrations/p1_add_provisioning_filter.html)。完成后选择 **Save**。

<div align="left" data-with-frame="true"><figure><img src="https://bitwarden.com/assets/1dgfaEYambvyHm7J4WBASe/9b2245b92629e61341856c8cb197be2f/2024-10-09_14-32-31.png?w=1400&#x26;fm=avif" alt=""><figcaption><p>Ping Identity 用户筛选器</p></figcaption></figure></div>

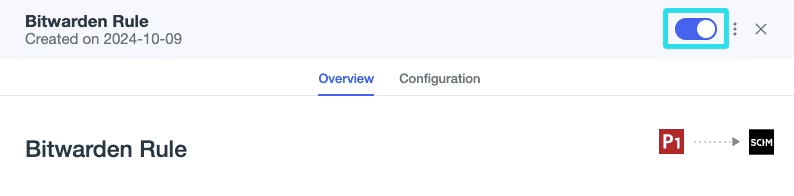
6、使用切换开关启用此规则。

<div align="left" data-with-frame="true"><figure><img src="https://bitwarden.com/assets/73Y4cHkTeLtxtuqB3xIrOR/6faf11b60a278eab11f5c83d52035b57/2024-10-09_14-37-44.png?w=794&#x26;fm=avif" alt=""><figcaption><p>Ping Identity 新增规则</p></figcaption></figure></div>

## 配置群组 <a href="#provision-groups" id="provision-groups"></a>

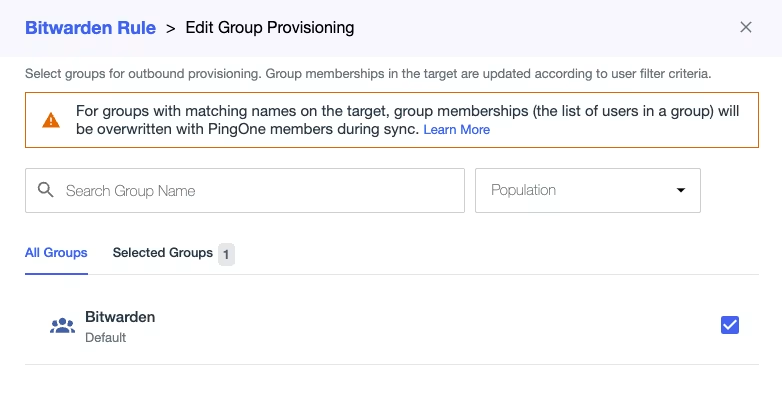
1、要分配群组，请返回 Provisioning 界面，然后选择规则 **≡Edit Group Provisioning**。

<div align="left" data-with-frame="true"><figure><img src="https://bitwarden.com/assets/10ztwQpTzsxZoi0vh83no6/f976a4f57d1fbe60b1f616f6114ce635/2024-10-09_15-11-57.png?w=782&#x26;fm=avif" alt=""><figcaption><p>编辑群组配置</p></figcaption></figure></div>

2、选择要配置的一个或多个群组，然后选择 **Save**。保存后，目录将触发同步。

## 附录 <a href="#appendix" id="appendix"></a>

### 必要属性 <a href="#required-attributes" id="required-attributes"></a>

Bitwarden 和 Ping Identity **SCIM Provisioner with SAML (SCIM v2 Enterprise)** 应用程序都使用标准 SCIM v2 属性名称。Bitwarden 将使用以下属性：

#### 用户属性 <a href="#user-attributes" id="user-attributes"></a>

* `active`
* `emails`<mark style="color:red;">**ª**</mark> 或 `userName`
* `displayName`
* `externalId`

<mark style="color:red;">**ª**</mark> - 由于 SCIM 允许用户拥有多个电子邮箱地址（以对象数组形式表示），Bitwarden 将使用包含 `"primary": true` 的对象的 `value`。

#### 群组属性 <a href="#group-attributes" id="group-attributes"></a>

* `displayName`（**必填**）
* `members`<mark style="color:red;">**ª**</mark>
* `externalId`

<mark style="color:red;">**ª**</mark> - `members` 是一个对象数组，每个对象代表该群组中的一名用户。


---

# Agent Instructions: Querying This Documentation

If you need additional information that is not directly available in this page, you can query the documentation dynamically by asking a question.

Perform an HTTP GET request on the current page URL with the `ask` query parameter:

```
GET https://help.ppgg.in/docs/admin-console/manage-members/scim/ping-identity-scim-integration.md?ask=<question>
```

The question should be specific, self-contained, and written in natural language.
The response will contain a direct answer to the question and relevant excerpts and sources from the documentation.

Use this mechanism when the answer is not explicitly present in the current page, you need clarification or additional context, or you want to retrieve related documentation sections.